Potato Faces

20170826_172308.jpg
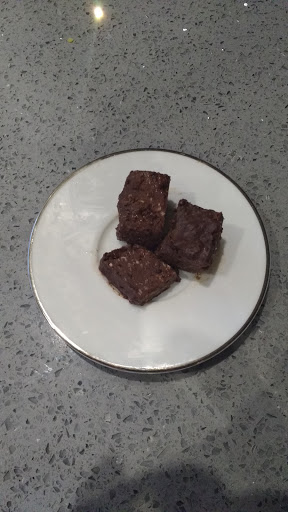
These were a bit of a gamble to be honest. They look a little creepy and do have green bits on show, but I decided to give them a try.  My kids are used to green flakes now, so this could be done perhaps with pea puree, sweet potato, I suppose any vegetable you like really.

We got back from holiday a couple of of days ago and my children, the youngest in particular, had had very little nutrition for the best part of two weeks. Every mealtime was a battle to get anything other than chips or ice cream into him, so I really needed to get something of substance!

We’d been on the go much of the day, so needed something quick and easy. I keep bags of frozen mashed potato in my freezer as a shortcut for when I can throw something together in a rush. In this instance, it was particularly useful.

You will need:

Mashed potato of two potatoes (if doing it from scratch) or around 150g of frozen mash.

3 discs chopped frozen spinach, or any pureed veg you prefer.

1 tin of tuna.

Method:

Defrost potato and spinach in microwave and mix together thoroughly. Add can of tuna and mix until combined.

Roll into balls and flatten into discs.  (I used a disc the size of my palm). With a skewer/end of fork/anything small and round to poke holes for eyes, nose and mouth.

Bake at 200 until golden.

My kids all ate them happily. My middle child (who hates potato) declared them ‘delicious’!

A small victory for us today!


Mac n’ Cheese 2

This is a big favourite in our house. Its based on the traditional mac n’ cheese but with some small additions that make it full of veggies.

I have done a blog post on this in the past, with cauliflour and white fish blended in, and you can still do that with this recipe if you wish, but this is an alternative version that is surprisingly good.

My big two wolfed it down without noticing any difference to normal. As for the little one, I won’t take it personally…

Veggies

2 large carrots

One large skinned courgette

2 tablespoons cream cheese

Additional Veg:

Assortment of red/yellow/orange peppers. Use anything between 1 and 3.

8 florets of cauliflour

(Be wary of adding too much green, though, you might get rumbled)

White Sauce

50g plain flour

50g butter

300mls milk

Grated cheese. (It would be great to get hold of some orange cheddar for this recipe, but mine didnt seem to notice it).

I began by chopping up carrots and courgette and boiling in water until very soft. (Make sure you have a big enough pot to get everything in). I boiled the vegetables until everything was very soft and then pulsed down to a very smooth mixture. I added a good lug of cream cheese into the mix (around 2 tablespoons), primarily to tone the colour down, but also to add a cheesy taste.

Separately, I made a classic white sauce (melt 50g butter, add in 50g plain flour and add 300mls milk, stirring until smooth) and added some grated cheese.

I combined the two mixtures together, to make a slightly orange looking white sauce. I added more cream cheese and grated cheese to maximise on the cheesy factor and bring down the colour a little more.

At this point you can either spoon the mixture over pasta, sprinkle with cheese and serve. Or, you can arrange the pasta in a dish, pour over the sauce, mix, top with cheese and put into the oven for a few minutes to crisp up and brown.

2 out of 3 ain’t bad, right?

Chocolate Chunks

This isn’t so much of a veggie recipe, but a sweet recipe that genuinely does not contain added sugar for children. With no milk or gluten here, this is a good recipe for those with allergies. Free of dried fruit, it looks like chocolate, and tastes like chocolate, although dark chocolate, so be warned this might be better for parents than children. Oh well…

This is incredibly easy to make, and the result is a truffle-like chunk of chocolate. A little too bitter for my younger daughter, but my baby boy and elder daughter shovelled it in happily!

I wouldn’t normally use a recipe using coconut oil. It’s not generally in my repertoire for any recipe, but since I happened to have this in my cupboard, I decided to give it a try. I’ve not used it before and was a bit unsure how it would turn out!

The ingredients are:

100g coconut oil

50g cocoa powder

1tsp of fruit spread (no added sugar jam)

1 mashed banana

1 tablespoon dessicated coconut

In a small saucepan, melt the coconut oil until liquid and add the cocoa. Mash the banana well and add to the mixture. Add the dessicated coconut, mix well and pour into a lined tin and allow to set in the fridge. When set, slice and serve.

IMG_20160803_204655379

Pizza

When I asked my daughter yesterday what she had been given for lunch, the answer was ‘meatballs and rice’. When I asked her what she had actually eaten, she looked away and mumbled ‘rice’. So I asked the dreaded question, ‘Did you eat the meatballs?’ Sadly the answer was no.

So I realised that she needed to have some protein at dinner. Unfortunately, pizza was on the menu. And whilst cheese is a great form of protein, I needed to think of a way to get even more protein into her that evening.

Now, ordinarily, I would have just given them meat for dinner, but I had another little lady (my niece) over for dinner, and when we have guests, I tend to stick with easy food. Pasta, pizza, fish fingers. Don’t deviate from the system. Plus, she’s always eaten my pizza.

So I decided to shake things up a bit. I used my regular dough  (225g plain or spelt flour, or half and half, 1 x 7g sachet of fast action dried yeast, a splash of olive oil and 120mls warm water to bring to a dough. Knead and roll out. I don’t let rise generally as I find the taste too yeasty!)

In a pan I put a good amount of mince meat, probably about a large handful, with diced yellow peppers. You could do this with any veg you like, I just happened to have this. I let it boil up together so the meat cooked and the peppers softened. When ready, I tipped into the magimix and blended until smooth. Added a jar of tomato pasta sauce and blended again.

I spread the sauce on top of the base, topped with cheese and baked at 200 until the crust had set and the cheese was golden.

Well. Nobody noticed. Not even my niece. And she’s smart.

My sister-in-law and I did a celebratory dance behind the fridge.

*This could also work with quorn or fake mince, but if you decide to omit the mince, you can still pack this with loads of vegetables into the tomato sauce  (for example, tomatoes, red/orange/yellow peppers, carrots, leeks, onions, garlic) and still be reassuringly smug.


Savoury Cheese and Carrot Muffins

  IMG_20160620_200525293
My kids love a good breakfast muffin. We often do the no added sugar banana muffins on a weekend morning, but sometimes a savoury muffin or two can be a really good meal.
It’s an odd combination, carrot and cheese. I wont lie. I wouldn’t normally associate these two flavours together, but it really works. Mainly because when cooked, you actually cant taste the carrot. At all. And because many kids like a cheesy flavour, it’s an added bonus that the colour of the cheese can disguise the vegetable. Here, I’m suggesting a red/orange cheddar because its the same colour as the carrot, but that’s entirely your choice. I used regular cheddar and it was still fine.
This is also an adaptable recipe, and you could try carrot and courgette, if you want. (I would suggest 4 carrots and 2 courgettes if doing this). I’m tempted to try parsnip but I’m not sure that’s a step too far for my lot.
But here’s the deal. You need to really pulse the vegetables in the blitzer. I’m not talking just a cheese grater. I mean really finely chopped. And, to be honest, once the blitzer is requiring washing up, you might as well bung the rest of the ingredients in.
You will need:
 
120g melted butter
4 eggs
6 grated carrots
300g SR Flour
Grated red/orange cheddar
Pinch of cinnamon
Orange zest
Blitz all ingredients, except the flour, in the magimix.
Transfer to another bowl and fold the flour in until just combined. Don’t overdo the mixing.
Spoon into a lined muffin tin and bake at 200 for around 15 minutes until golden and risen.
We got a big thumbs up for these tonight!

Fishcakes

This is a really good recipe if you have little ones who are anti fish and will not go near it because of the smell. These are fishcakes made with white fish rather than salmon or tuna, which are can be more of an acquired taste. I like that you can fib and say its only potato if your child is unwilling to accept fish. What I like about this, too, is that I used ground almonds in the breadcrumb crust to give an extra hit of protein, but as an extra bonus left the fishcakes with a good crunch on the outside.

This was a bit of an experiment, so my quantities are a little sketchy here. I also will admit to taking a shortcut with frozen, ready made mashed potato.

You will need:

2-3 fillets white fish. I used Seabass because I had it in the freezer, but haddock, cod, plaice or any white fish will do.

2 large cooked potatoes or 12 discs of frozen mash

1 tablespoon mayonnaise

1 teaspoon dijon mustard

2 slices wholemeal brown bread.

2-3 tablespoons ground almonds

3 tablespoons cooked peas

Begin by cooking the fish. I oven baked the seabass in olive oil until cooked and soft.

Meanwhile, blitz the bread to crumbs in the magimix and add the ground almonds. Remove crumbs to a plastic food bag and set aside. If you have a child with wheat/gluten allergy you can substitute the breadcrumbs for polenta and it works equally well.

Cook (or, erm, defrost) your potato and put into magimix. Add the cooked fish, add the dijon mustard, mayonnaise and blitz until smooth. (You can pulse less if your child is ok with fish flake texture). Add a few of the breadcrumbs into the magimix to firm up the filling. Add your peas and blitz again.

Roll mixture into patties (your choice of size) and put them into the breadcrumb bag to coat. Lay on a plate lined with kitchen towel and continue until you have finished the mixture. You may need two plates. Chill in the fridge for around 30 mins until you are ready to cook.

Heat a frying pan with oil and shallow fry on both sides until golden brown. Cool and serve.

There’s no picture to show because I didn’t have a chance to take one. They got eaten too fast!

Enjoy!

Jam Tarts

IMG_20151216_213142

Ok, so it’s Christmas! And we all know what that means; treats, treats and more treats. It’s hard at this time of year with young children as they tend to go sugar crazy and get caught up with all the excitement of Christmas. It’s totally understandable with every table in sight offering sweets and chocolate. With this in mind, I do think that perhaps us parents could do with a little help with treats that are not laden with sugar, but will make a child feel that they are getting something really special.

My kids love a good jam tart. These little tarts are very homely and will make your house smell delicious. The kids will love to get involved in making these too, which makes them excellent for a rainy day activity. They are so simple, and free of added sugar (if you use fruit spread). As a result, they aren’t too sweet, but they hit the right note when you do need a little something special.

Ingredients:

225g plain flour

1 tsp mixed spice or cinnamon (optional)

100g butter

1 egg yolk,

1-2 tablespoons cold water

Fruit spread (any flavour you like – I use Waitrose Superjam)

Method:

Put butter in a bowl and rub in the flour until like breadcrumbs. Add the spices, if using. Crack the egg into the bowl and add the cold water and mix until the mixture comes together into a dough. Cover and refrigerate until it is a rolling consistency. Roll out and cut circles with a round cutter. Line these circles onto a muffin tin to make little cases. Spoon in a tablespoon or so of jam into each case. Any leftover dough you can roll out and cut stars (or any shape you like) and lay across the top to decorate.

Bake at 200 until golden. This recipe makes around 10 tarts.

Tip 1 : If you are REALLY cunning, you might be able to sneak a little cooked beetroot into the jam by blitzing it up and adding it to the jam.

Tip 2 : If you omit the cinnamon, the dough can be used as a really good savoury tart or quiche case, although you will most likely need to double the quantity.

Enjoy!


Cauliflour Fish/Chicken Goujons

IMG_20151123_204848
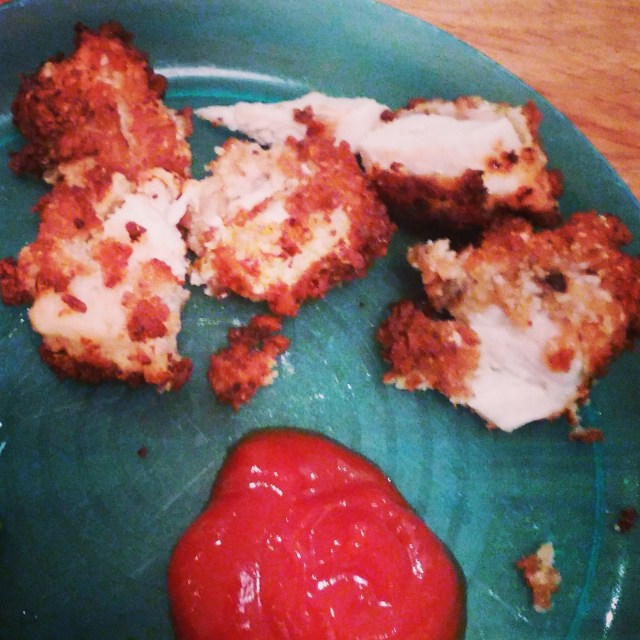
I know it seems unusual to do a blog post on this. Fish fingers, chicken nuggets and fish goujons are all very easily bought from the shops. I know that people often panic at the thought of making their own but in truth, it really is such a simple method, and just as quick to make as prepared oven ones. It is also very versatile, so if you have a child with allergies you can vary things by omitting the egg or changing the flour.

Don’t get me wrong, I will freely admit that I sometimes give my kids supermarket bought fish fingers/chicken nuggets, and I will also admit that I will happily eat these for dinner myself, but there are just times when home made seems a good option.

I have been thinking about this recipe for a while. I have made homemade fish or chicken goujons over the years, sometimes experimenting with different types of batter or breadcrumbs (challah, wholemeal, full-on fish and chip shop batter style). But I kept wondering what would happen if I blitzed cauliflour into the breadcrumbs. So I gave it a whirl. And they ate it. So thumbs up for me, and thumbs up from them.

It’s a very crunchy end result because the cauliflour goes really crispy. The baby, admittedly, found it a bit hard to eat as his gums couldn’t get round it too well, but the big ones demolished it with no fuss.

So here’s the recipe:

2 fillets of either chicken or white fish

3 slices wholemeal bread

Around 7 florets of raw cauliflour

2 eggs

Plain flour

cooking oil

I blitzed up the cauliflour until breadcrumb like, then added in the bread. (It did go a tiny bit wet, don’t worry too much about this)

Into 3 bowls I put the beaten eggs, flour and breadcrumb mixture.

Cut the chicken/fish into bitesize chunks and dip a chunk into first the flour, then the egg, then the breadcrumb mix. It does need patting down to fully coat and place on a plate until all are coated.

Fry in batches until all are cooked through.

Enjoy!


Chocolate brownie batter

IMG_1881

Or raw cookie batter. Or chocolate balls. Whatever you decide to call them, these are a delicious little treat for anyone in the family. My baby boy has been noshing down on these since he was about 9 months and I get satisfied grins from him and clapping hands, so they definitely hit the spot!

Now, I know this is not a vegetable post, but what this is, instead, is a post that will get a sweet treat into your child that is filled with nutrition and calories, without any nasties. My 6 year old has a jaw achingly sweet tooth, and yet these seem to make her very happy.

What I like most about this recipe is that any nut will work here, so if your child has a specific nut allergy you can chop and change as you please. Obviously be aware of any nut allergies before you go ahead and make this, though!

I personally like to make this with peanut butter, but any nut butter (or whole nuts) will do. I have made this with mixed nuts in the past also. Brazil, hazelnuts and macadamia nuts work especially well.

If you are using whole nuts, put a large handful into the magimix and blitz until very fine. (Otherwise, put a large spoonful of peanut butter into the magimix). Followed by a tablespoon of good cocoa, a teaspoon or so of desiccated coconut (optional), 3 medjool dates and a teaspoon if water and blitz. Really blitz until the dates are soft, the coconut starts to release its oil and the batter clumps together.

Take a teaspoon and scoop and roll into little balls. Or, like I have done, press the mixture into a ramekin and dig in.

Enjoy! Xx

Cornish Pasties

I don’t want to sound smug here. Really I don’t, but my child now eats peas. Hurrah!  So, as a result, this recipe has peas in it although the addition is entirely optional.

It started when we took our children to Cornwall over a school half term recently, and found ourselves in a lunch place where the choice was either chips or Cornish pasties. I have no problem with chips (and neither do my kids, let’s face it), but I do like to try and encourage a little nutrition where possible. We were pretty impressed that given the choice, our 5 year old went for the pasty. And wolfed it down, peas and all!

So I started to make my own pasties when we got back and they are now a staple in our household. The reason that I like these is that they are so completely versatile, and they really can have any filling you like. Although I once tried them with a meat combination and you would think I was trying to serve up poison. But that’s just my children, yours might like meat in them!

I use a basic shortcrust pastry for this recipe, although you can use a shop bought puff pastry if you like.

You will need :

240g plain flour

130g softened unsalted butter

2-3 tablespoons cold water

To make the pastry put the flour in a bowl and rub in the butter until like breadcrumbs. Add the water slowly until it comes to a dough.  You can chill in the fridge but if really short on time divide the dough into 6, roll out and shape into circles or squares. (If chilling, you can roll out and cut the dough much more easily).

For the filling and for little fussies I might suggest the following:

Make a mash In any combination you like, including or excluding white potatoes, sweet potatoes, Carrots, butternut squash. Pumpkin if you are feeling brave! All previously cooked until soft and mashed.

Dollop a tablespoon or so of the mash onto one of the squares/discs and top with grated cheese. I put the peas in but this is your choice. Top with another piece of pastry, seal the edges down with a fork and brush with a little beaten egg.

Bake at 200 until the pastry is biscuit like in texture and golden.

And if you are feeling extra brave you can try some peas on the side.